6.3.3. 调试指南
6.3.3.1. 调试开关
6.3.3.1.1. DE 调试开关
参考快速入门 - 编译概述 - Kernel配置,进入 kernel 的功能配置,打开 DE 模块的 DEBUG 选项:
Linux
    Kernel hacking
        ZX Debug
            [*] DE driver debug
此 DEBUG 选项打开的影响:
DE 驱动以-O0编译
DE 驱动的 pr_dbg()和 dev_dbg()调试信息会被编译
在系统运行时,如果要打印 pr_dbg() 和 dev_dbg() 信息,还需要调整 loglevel 为8,两个方法:
在 board.dts 中修改 bootargs,增加 “loglevel=8”
在板子启动到 Linux shell 后,执行命令:
echo 8 > /proc/sys/kernel/printk
小技巧
如无特殊说明,本文档中的 DE 驱动表示显示模块的驱动,包含显示引擎模块,显示接口模块,LCD 的 panel 驱动。并非仅仅指示显示引擎。
6.3.3.1.2. CMA 调试开关
参考快速入门 - 编译概述 - Kernel配置,进入 kernel 的功能配置,打开 CMA 框架的 DEBUG 选项:
Linux
     Memory Management options
         [*]   CMA debug messages (DEVELOPMENT)
         [*]   CMA debugfs interface
这两个 DEBUG 选项打开的影响:
CMA 框架中 pr_debug() 调试信息会被编译
debugfs 中添加 cma 结点
6.3.3.2. Component
查看Component的注册信息,
# mount -t debugfs none /sys/kernel/debug/
# cat /sys/kernel/debug/device_component/soc\:display-fb
master name                                            status
-------------------------------------------------------------
soc:display-fb                                          bound

device name                                            status
-------------------------------------------------------------
98a00000.de                                             bound
98800000.rgb                                            bound
panel0                                                  bound
如果 bound 失败,控制台输出如下:
# cat /sys/kernel/debug/device_component/soc\:display-fb
master name                                            status
-------------------------------------------------------------
soc:display-fb                                      not bound

device name                                            status
-------------------------------------------------------------
18a00000.de                                         not bound
18800000.rgb                                        not bound
(unknown)                                      not registered
6.3.3.3. CMA
在 menuconfig 配置中使能 CMA debug 开关后,可通过 debugfs 调试 CMA。
# mount -t debugfs none /sys/kernel/debug/
# ls /sys/kernel/debug/cma/cma-reserved/
alloc          bitmap         free           order_per_bit
base_pfn       count          maxchunk       used
CMA 调试接口:
alloc
申请 cma 内存,以 page 为单位
free
释放 cma 内存,以 page 为单位
base_pfn
cma 内存起始页框号
count
cma 总 page 数
maxchunk
cma 最大连续 page 数
order_per_bit
每个 bit 代表 2 ^ order_per_bit 个 page
bitmap
记录 cma page 使用情况的位图。1 表示占用,0 表示空闲
查看 cma 使用情况:
# cat /sys/kernel/debug/cma/cma-reserved/bitmap
4294967295 4294967295 4294967295 4294967295 4294967295 4294967295 4294967295 4294967295 4294967295
4294967295 4294967295 4294967295 4294967295 4294967295 4294967295 4294967295 4294967295 4294967295
4294967295 4294967295 4294967295 4294967295 4294967295 4294967295 4294967295 4294967295 4294967295
4294967295 4294967295 4294967295 4294967295 4294967295 4294967295 4294967295 4294967295 4294967295
4294967295 4294967295 4294967295 4294967295 4294967295 4294967295 4294967295 4294967295 4294967295
4294967295 4294967295 2097151 0 0 0 0 0 0 0 0 0 0 0 0 0 0 0 0 0 0 0 0 0 0 0 0 0 0 0 0 0 0 0 0 0 0
0 0 0 0 0 0 0 0 0 0 0 0 0 0 0 0 0 0 0 0 0 0 0 0 0 0 0 0 0 0 0 0 0 0 0 0 0 0 0 0 0 0 0 0 0 0 0 0 0
0 0 0 0 0 0 0 0 0 0 0 0 0 0 0 0 0 0 0 0 0 0 0 0 0 0 0 0 0 0 0 0 0 0 0 0 0 0 0 0 0 0 0 0 0 0 0 0 0
0 0 0 0 0 0 0 0 0 0 0 0 0 0 0 0 0 0 0 0 0 0 0 0 0 0 0 0 0 0 0 0 0 0 0 0 0 0 0 0 0 0 0 0 0 0 0 0 0
0 0 0 0 0 0 0 0 0 0 0 0 0 0 0 0 0 0 0 0 0 0 0 0 0 0 0
# cat /sys/kernel/debug/cma/cma-reserved/count
8192
# cat /sys/kernel/debug/cma/cma-reserved/used
1525
# cat /sys/kernel/debug/cma/cma-reserved/base_pfn
548864
# cat /sys/kernel/debug/cma/cma-reserved/order_per_bit
0
手动申请 100 个 page
# echo 100 > /sys/kernel/debug/cma/cma-reserved/alloc
手动释放 100 个 page
# echo 100 > /sys/kernel/debug/cma/cma-reserved/free
sysfs 的 meminfo 结点亦可查看 CMA 的使用情况(为节省篇幅,已省略无关信息):
# cat /proc/meminfo
    ...
    CmaTotal:          32768 kB
    CmaFree:           29068 kB
小技巧
CmaFree 中记录的信息并不准确,推荐使用 debugfs 中 cma 节点的 bitmap 来查看 cma page 的使用情况。
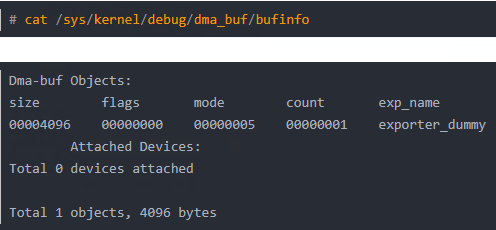
6.3.3.4. DMA-BUF
在 debugfs 中查看当前 DMA-BUF 的使用情况:
mount -t debugfs none /sys/kernel/debug
cat /sys/kernel/debug/dma_buf/bufinfo
小技巧
Component, CMA,DMA-BUF 相关概念在后续设计说明章节会有补充介绍。
6.3.3.5. /dev/fb
在 sysfs 中查看 /dev/fb 的一些信息:
# ls /sys/devices/platform/soc/soc\:display-fb/graphics/fb0/ -l
-rw-r--r--    1 root     root          4096 Jan  1 00:01 bits_per_pixel
-rw-r--r--    1 root     root          4096 Jan  1 00:01 blank
-rw-r--r--    1 root     root          4096 Jan  1 00:01 console
-rw-r--r--    1 root     root          4096 Jan  1 00:01 cursor
-r--r--r--    1 root     root          4096 Jan  1 00:01 dev
lrwxrwxrwx    1 root     root             0 Jan  1 00:01 device -> ../../../soc:display-fb
-rw-r--r--    1 root     root          4096 Jan  1 00:01 mode
-rw-r--r--    1 root     root          4096 Jan  1 00:01 modes
-r--r--r--    1 root     root          4096 Jan  1 00:01 name
-rw-r--r--    1 root     root          4096 Jan  1 00:01 pan
-rw-r--r--    1 root     root          4096 Jan  1 00:01 rotate
-rw-r--r--    1 root     root          4096 Jan  1 00:01 state
-r--r--r--    1 root     root          4096 Jan  1 00:01 stride
lrwxrwxrwx    1 root     root             0 Jan  1 00:01 subsystem -> ../../../../../../class/graphics
-rw-r--r--    1 root     root          4096 Jan  1 00:01 uevent
-rw-r--r--    1 root     root          4096 Jan  1 00:01 virtual_size
# cat /sys/devices/platform/soc/soc\:display-fb/graphics/fb0/bits_per_pixel
32
# cat /sys/devices/platform/soc/soc\:display-fb/graphics/fb0/blank
# cat /sys/devices/platform/soc/soc\:display-fb/graphics/fb0/console
# cat /sys/devices/platform/soc/soc\:display-fb/graphics/fb0/dev
29:0
# cat /sys/devices/platform/soc/soc\:display-fb/graphics/fb0/mode
# cat /sys/devices/platform/soc/soc\:display-fb/graphics/fb0/pan
0,0
# cat /sys/devices/platform/soc/soc\:display-fb/graphics/fb0/name
aicfb0
# cat /sys/devices/platform/soc/soc\:display-fb/graphics/fb0/stride
3200
# cat /sys/devices/platform/soc/soc\:display-fb/graphics/fb0/virtual_size
800,480
6.3.3.6. Display Engine
在 sysfs 中查看当前 display engine 的一些信息:
# cat /sys/devices/platform/soc/18a00000.de/debug/display
Video Layer Enable       : 0
Video Layer Format       : 0
Video Layer Input Size   : 0 x 0
Video Layer Stride       : 0 0
Scaler Output Size       : 0 x 0
UI Layer Control         : format: 0, color key: 0, alpha: 1
UI Layer Input Size      : 1024 x 600
UI Layer Color Key       : 0
UI Layer Alpha           : mode: 0, g_alpha: 255
UI Rectangle Control     : 1 0 0 0
UI Rectangle Size        : (1024, 600) (0, 0) (0, 0) (0, 0)
UI Rectangle Offset      : (0, 0) (0, 0) (0, 0) (0, 0)
UI Rectangle Stride      : 4096 0 0 0
Tearing-effect           : TE mode: 0, TE pulse width: 0
Display Dither           : dither_en: 0, red depth: 0, green depth: 0, blue depth: 0
Display Timing           : hactive: 1024, vactive: 600 hfp: 160 hbp: 140 vfp: 20 vbp: 12 hsync: 20 vsync: 3
Display Pixelclock       : 60000000 HZ
小技巧
UI Layer Control 中的 color key 和 alpha 表示 enable / disable 状态。 UI Layer Color Key 才表示 color value。
6.3.3.7. Color bar
在 sysfs 中使用 display engine 的 color bar 模式进行调试
// 开启 color bar
# echo 1 >  /sys/devices/platform/soc/18a00000.de/debug/color_bar

// 关闭 color bar
# echo 0 >  /sys/devices/platform/soc/18a00000.de/debug/color_bar
6.3.3.8. Framebuffer 截图
拷贝 /dev/fb0 裸数据,使用 RawViewer 查看
# cp /dev/fb0 fb0.bgra
使用ADB pull fb0.bgra 文件,在PC 上使用 RawViewer 软件查看。
RawViewer 软件可在其官网免费下载:http://www.filefriend.net/#RawViewer
小技巧
使用 RawViewer 查看 fb0.bgra 文件,需要手工设置数据源的宽高,在开启双 buffer 的场景下,要将高度 * 2。